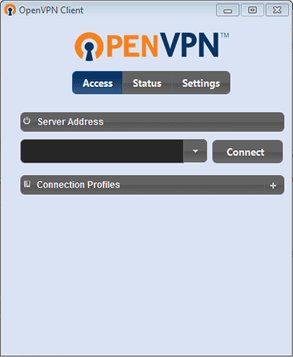
The old OpenVPN Client interface.
After finish installing OpenVPN on Windows 8.1, we will get OpenVPN GUI icon appeared on desktop / Apps list. By the time this article is written, the latest OpenVPN version is 2.3.6.
OpenVPN GUI has different interface than the OpenVPN Client interface from older OpenVPN version that appeared on various tutorials across the internet. This interface difference can make users confused at first as there is no obvious clue on how to configure the connection profiles to connect to VPN on the OpenVPN GUI interface.
OpenVPN GUI interface after it is just installed
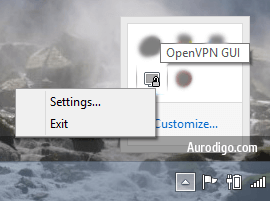
Clicking the OpenVPN GUI icon on desktop will just open up an icon on the icon tray on taskbar at your monitor's bottom-right (pointed by red arrow). Double left-click it will bring up nothing. You have to right-click on the icon and its interface will show up. It is just Settings and Exit. The Settings menu is for the OpenVPN itself - no sight of place / settings to configure the connection profiles.


OpenVPN GUI Settings
Configure Connection Profiles
Make ready your connection configuration file. The configuration file has .ovpn file extension.
Copy the configuration file you want to use to config folder in your OpenVPN's installation folder. The default location is C:\Program Files\OpenVPN\config.
Once you copied the configuration file to config folder, the configuration settings of your connection profile will show up on the OpenVPN GUI icon when you right-clicked it. Hover over your chosen connection profile and the option to connect, view log, edit config, and change password will be displayed.

Click connect. Make sure you have run OpenVPN GUI as administrator. If the connection you want to use is password protected, you will be prompted to enter username and password. Wait for the connecting progress to complete until a notification message popup from the OpenVPN GUI icon on the taskbar, stating that you are now connected to the VPN with certain IP address assigned to you. The OpenVPN GUI icon will also turned to green indicating the VPN is connected.
Issue: VPN is connected, but IP address does not change
It happens likely because you are not running the OpenVPN GUI with administrator's right. Without administrator's right, it can not change your current IP address even if you have been connected to a VPN connection correctly.
There is few ways to access settings to run OpenVPN GUI as administrator.
- From OpenVPN GUI icon on desktop.
- From openvpn-gui.exe file in bin folder in OpenVPN installation folder (C:\Program Files\OpenVPN\bin).
Both ways is the same thing. Just choose which one is faster to be accessed.
- Right click on the icon > choose "Run as administrator".
If you don't want to do it every time you want to run OpenVPN as administrator, you can set as default by:
- Right click on the icon > Properties > Compatibility tab > Settings section > Check the option "Run this program as an administrator" > Click OK
Share your experience using OpenVPN on comment section below.